How to Resize Notion Images to the Same Size Automatically?
By whoibrar

Introduction
One of the most versatile features of Notion is its support for various media types.
Images are the most among all media types.
But sometimes an image is often too high vertically or too wide to fit on a screen.
This can happen due to a multitude of reasons, you might’ve copied a higher resolution image and Notion defaulted to show it that resolution. Or, you could’ve saved a page in Notion using a web clipper which saves the images in higher resolutions.
This can be frustrating and you often end up spending more time fixing the image sizes rather than getting the work done.
But you don’t have to do that.
By using some custom CSS you can make the images look just the right size.
CSS Code Snippet
img {
max-height: 200px;
object-fit: contain !important;}
What is CSS?
Firstly, you don’t need to understand this in order to make use of this method, you can skip this part if you feel like it.
But once you understand what this code snippet does you’ll be able to leverage it further.
CSS stands for Cascading Style Sheets, and as the name suggests it is used to add styling to web pages. Here, we are going to be using the above CSS code.
imgstands for image and we are selecting all imagesmax-height, we are setting all images to be of this particular size. We’ve found 200px to work best. You can play around with this number to make it work for you. This will sometimes crop the image on top and bottom if it is too long and that’s whereobject-fitcomes in, which specifies the image to “contain” inside those fixed parameters.!importanthere is used to override other styling.
Using Stylebot Extension
Before and After the CSS style is applied.
Stylebot is a popular Chrome extension that can be used to add custom styling to any webpage. It has over 200K+ downloads and really simple to use.
We are going to be using this extension in order to change the styling of images and make them fit our requirements.
You can see the image of the Eiffel tower being immediately shrunk down when the CSS code is in effect (i.e., uncommented state - without /* */ on either side).
How to use Sytlebot
Pin the extension. Source: stylebot.dev
Head over to the Chrome web store and click on “Add to Chrome”
Once you have the Stylebot installed, open the extensions menu and pin the extension
Head over to the Notion page and select the “Code” section at the bottom
Copy the CSS code and paste it into the text field provided.
Change the value until it fits your desired size (optional)
How to revert back?
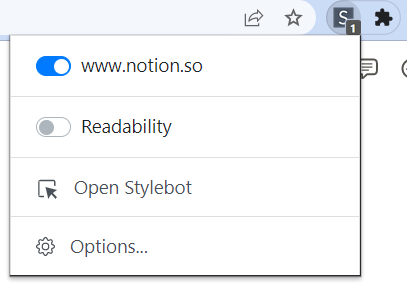
Clicking on the Stylebot extension.
For some reason, if this breaks something or you need to revert back the changes and make your Notion page as it was earlier, you need to do this. Simply click on the Stylebot extension and trigger off the Notion site to turn off the extension working on all Notion sites at once.
Note on change: Longevity
Though this can be helpful and sets the images in a more visually appealing size, it doesn’t change the size of the actual image stored in Notion. This change is made only at the level of presenting on the browser screen with the help of the Stylebot extension.
Hence, if you visit the same page on another computer where the above CSS code is not applied, it will not change the image sizes.
Conclusion
By using this simple extension you can make all the images in your Notion pages look in more visually appealing sizes.
This change is in effect as long as the extension is active.
You can turn it on/off anytime with just a click of a button.

